

So I was listening, as one does, to some of those poddy talk-show things. A couple of them mentioned the use of filters in black and white film photography. The discussion came around to what effect filters have and what to use them for. I started by shouting at the radio (I was listening in the car while commuting). Then it migrated to ‘as any ful kno’. Then it changed to my thinking how best to describe what filters do. This is that description. You may prefer that I stayed the silent fool.
Let’s get colour out of the way first. If you avoid the use of those awful Cokin filters of yore (you thought a tobacco graduate was a university-leaver making a poor career choice?), you are left with two basic filters: neutral density and polarising.

ND filters will let you either use long exposures for those creamy moving water shots or, in graduated form, hold back a bright sky to give the foreground a chance.
Polarisers can take reflections off glass and water, darken some areas of the sky and increase contrast. Here endeth the colour filters.
Black and white is capable of much more manipulation. The basic idea is that a coloured filter lightens its own tone on the negative and darkens the complimentary (meaning opposite) colour. “Fine” you may think “but what’s the opposite of green?”. Strictly it’s magenta, but you can vary between blue and red to get the exact effect you want.
There is a very good online resource here that describes how colours are grouped and work together and has an interactive colour-picker to let you experiment. As an aside, if you find a colour you like, it gives you the RGB values for it, which you can use in Photoshop to tone an image. Perhaps a subject for a future post.
Traditionally, anyone shooting landscapes on mono film used a yellow filter. Yellow darkens the appearance of blue, so makes the skies darker and the clouds stand out more. The haze you see over distant objects is also blue, so a yellow filter cuts through this a bit and makes the scene look a bit clearer.
This works for all colours, but there is a little complication that stops the story ending right here – colour sensitivity.
The makers of black and white film had to work hard over many years to make it sensitive to all of the visible colours of light. The first films were really only sensitive to blue and were known as Orthochromatic. Since they can’t really ‘see’ red, they can be developed under a safelight. Most photographic enlarging paper is orthochromatic. Being only sensitive to blue doesn’t matter, as the subject has already been converted to black and white on the negative. There is a real benefit in being able to see what you are doing in the darkroom (or the ‘red room’ as watchers of Stranger Things are calling it).
Gradually the manufacturers added sensitivity to green and red, giving us modern Panchromatic film that can see the full visible spectrum.
You can see the difference in portraits taken on old and new film. The old Ortho film darkened skin and lips and struggled to render skies as anything but white. And note – there is no point in putting a red filter on a camera using Ortho film – it would only have the effect of a fairly strong neutral density filter. On the other hand, if you want to recreate the old Ortho look in a scene or portrait, use a blue filter on a modern Panchromatic film.
The fun comes in that, in adding sensitivity to red light, some films strayed over the line (bad films!) into the infrared. Using a strong red filter on these films can give the effect of using specialised infrared film. This renders blue skies as black, cuts through any atmospheric haze and can render leaves and grass as white. This is because the chlorophyll reflects infrared quite strongly. So a red filter, that you might have expected to make green go very dark, can actually cause it to go white. It depends on the film though, and on the amount and direction of sunlight.
So where does this take us with filters? Filters lighten their own colour and darken the opposite colour, within the constraints of what the film is capable of seeing. A red filter will darken grass and blue skies, lighten brickwork and make pale skin paler. A red or orange filter can subdue the appearance of freckles on pale skin. A green filter will darken blue skies but also lighten grass and leaves and darken brickwork.
You can see how filters treat colours differently if you have a copy of Photoshop or Elements that can do layers. Open a colour picture in the application. Add a new layer above the image – make it a hue/saturation adjustment layer and make the blending mode Colour (or Color). Name it Filter.
Make a second hue/saturation adjustment layer on top of this one and name it Film. Double-click the layer thumbnail and drag the saturation slider to -100. This will turn the image to black and white. The layers should look like the picture below.

Go back to the Filter layer and double-click the layer thumbnail and drag the Hue slider from side to side. What you are doing is seeing how a black and white film renders a colourful scene through various colours of filter.
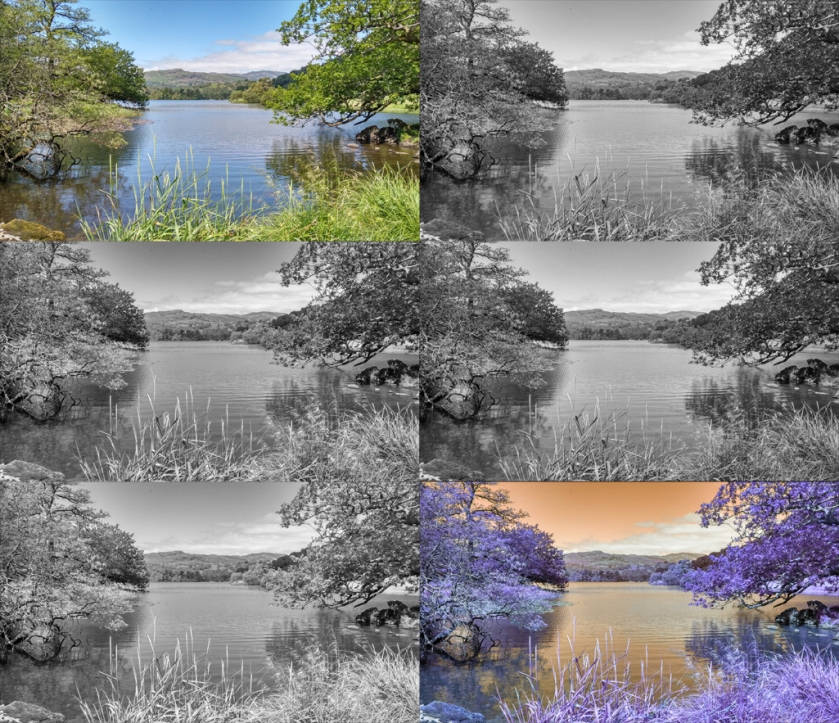
The picture above shows what you can do. The original image is top left. The other images are various twekas of the Filter settings. The weird image bottom right is what the colours look like in my favourite settings, with the mono-conversion layer switched off. You may just prefer this anyway.
It’s worth a play, as you may find a setting that gives you a really sharp tonal separation in what would have been a blur of blending greys.
Actually, there is one more thing you can do with colour film or digital and filters and it involves flash. Put a blue filter over the lens and a yellow filter over the flash. Shoot portraits close enough to be flash-lit. The background will go a deep evening blue. This is how to shoot day-for-night.

Try it, and try the mono filters thing too.

One thought on “Through a glass, darkly.”