

I have Peggy to thank for this.
I’ve been fascinated for a long time with the look of infrared photography. I even got to shoot a roll of the famous Kodak HIE before it dodo’ed.

I went so far as to convert an old Agfa Super Silette to IR-only by fitting (gluing) a piece of infrared filter behind the lens. That didn’t work too well at first because I misjudged the exposure. What I really wanted though was an IR-converted digital camera so I could see the results as I was taking the pictures. This involves removing the infrared absorbing filter that sits in front of the sensor. I didn’t have a spare dSLR and my various other digital cameras were too difficult or too expensive, so it went on the wish list.

That’s a bit of Lee polyester IR filter (730nm cut-off) behind the lens.
And then came Peggy’s article about Panasonic Lumix compacts. It seems that the sensor, and hence the filter, are ‘easily’ accessible through the back of the camera. What could possibly go wrong?
The first thing was to find a suitable camera. There are loads on fleabay, but the prices vary quite a lot. There are even some that have already had the filter removed – it seems that people attach them to rifles as a night sight. Eventually one turned up that was the right type but suitably undesirable, so cheap.
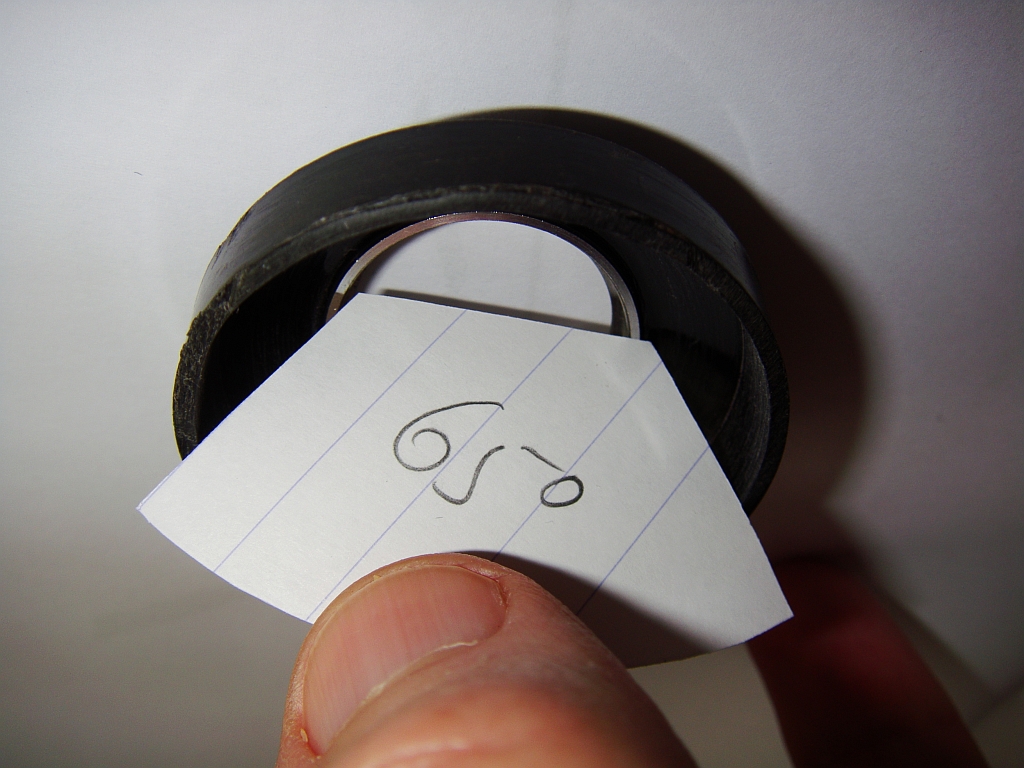
The screwdrivers were the next issue. I have several sets of jeweller’s screwdrivers that I have accumulated, but the camera used particularly tiny screws. Eventually a specs repair kit yielded a suitably tiny screwdriver. And then as soon as I got the back off the camera I went looking for a magnet – I didn’t want to be turning the camera over to shake out any screws I dropped. A few swipes over the magnetic clasp of a camera bag made the screws stick to the screwdriver and we were away. It really was fairly simple to lift away the sensor and remove the IR filter. I then cut a tiny piece from my Lee IR filter (8 by 10mm) to go in its place. This makes the camera permanently IR only, but means that I don’t need to mount a fragile bit of filter gel on the front of the lens. Besides, I can always go back in and remove it now I know how.
Challenge two is to charge the battery. The camera came without a charger, hence it was cheap. I have a USB cable that fits the camera, but this doesn’t charge the battery. I tried hot-wiring the battery + and – terminals to a USB cable (which delivers 5v) and to a 4.5v mains adapter. No joy. It looks like the battery also needs the ground terminal connected, which is why proper chargers have three pins and not two. So a charger is on its way to me from China. <interlude with hold music> The charger arrived and did its chargey thing and then we were charged.
And it only darned well worked! The first shot out into the garden looked like it had been snowing. I immediately took the dog for a walk and photographed everything.

So it works very well indeed. But… Now I know why nobody fits the IR cut-off filter inside the camera. It restricts you to mono-only pictures without the option of the weird false colour effect you can get without the filter. So how to fit a filter to a camera with a pop-out lens?
Taking the IR-cutoff filter out was easier than fitting it in the first place, as I knew the sequence and the non-obvious screw that has to be removed. Without the IR cut-off filter in front of the sensor the autofocus hunts a bit. This is probably because visible and infrared light focus at different points. Fair enough – the camera has a setting that gives priority to infinity focus, so that’s what I went for. That didn’t work very well, but the next option was to use multi-point focus rather than a single spot. That seems to work a lot better.
Back to the bits box, and the benefit of hoarding old junk is that you can cobble some of it into gadgets. There in the box, previously unloved, was a 29mm push-on filter. The outermost segment of the lens, when it telescoped out, was 29.3mm diameter. The push on filter was thin brass. The crude and violent use of a socket and a hammer spread the mouth of the filter to be a snug fit over the lens. In the same box was a lens hood that was a reasonable fit over the filter. A trial fit showed that it was too deep and vignetted the corners. A few minutes with a hacksaw took care of that. A dab of glue and hello push fit IR cut-off filter with wide angle hood.
And now I can play. With the hood on and the camera in mono mode, I have the traditional Wood effect of white leaves and black skies. With the hood off I get the false-colour effect of purple leaves and weirdness. Most excellent!

Plus, pop the filter back on and I can do the high contrast black and white thing.

So, many thanks to Peggy for the tip that this could be done at home.
PS
I have refitted the cutoff filter in front of the sensor. The external filter/hood gadget worked but I was in constant danger of dropping something while fiddling it on and off.
There’s an update here.

Awesome, I didn’t even think to put a different filter over the sensor. I might have tried that as my infrared filter is now scratch to hell. Though I will only ever use it with my converted camera so no biggy. I might try adapting a bone scratched part to stay over the lens with something too.
I definitely need to take it out and use it again 🙂